Every booth on the floor is promising to revolutionize something. The challenge isn’t standing out. It’s standing out while still looking like a company people would trust with their money.
That tension defines fintech trade show booth design. Hype is cheap in this category. Trust is not. And your booth is one of the most expensive brand moments you’ll produce all year. It needs to attract qualified conversations, support demos that actually land, and give your team cleaner follow-up than a bowl of business cards and a shared Google Sheet.
These six design moves work best when booth design is treated as a full event system (strategy, spatial design, collateral, and post-show execution working as a single piece), not a graphics project handed off the week before the show.
1. Build Your Entire Booth Around One Sharp Message
Fintech buyers at a trade show are processing hundreds of booths in a single pass. They aren’t reading your backwall. They’re scanning it the way they’d scan a search result: headline, visual cue, gut check, move on. If your booth tries to communicate three product lines, two audience segments, and a platform rebrand simultaneously, you’ve already lost them. Not because the information isn’t relevant. Because no one will slow down long enough to sort through it.
The discipline here is simple to describe and surprisingly hard to execute: one promise, one proof point, one desired next step. That’s the entire messaging architecture.
Your backwall headline states the promise. Your side graphics reinforce it with a single supporting visual or data point. Your screen loop demonstrates it in motion. Your one-pager hands it to them in a format they can carry away. Your staff opener repeats it in conversational form within the first ten seconds. Every format tells the same story. Every touchpoint confirms the same value proposition.
This isn’t minimalism for its own sake. It’s borrowed from a principle the best fintech demo stages have already proven. Platforms like Finovate give presenters roughly seven minutes and zero slides to make their case. That compression forces a clarity most marketing teams never achieve voluntarily. Your booth should operate under the same constraint, even if no one is holding a stopwatch.
Look at which competitors consistently attract foot traffic and you’ll notice a pattern: clean, minimalist ROI messaging. Not feature inventories. Not product taxonomies. A single outcome the buyer cares about, stated with enough confidence that it invites a question rather than a glaze-over. This principle of sharp, outcome-focused positioning is central to effective fintech marketing well beyond the trade show floor.
The practical unlock is recognising that this message discipline doesn’t start on the show floor. It starts weeks earlier, when the booth concept, the collateral brief, the demo script, and the pre-show LinkedIn campaign are all being developed together. When the story stays consistent from the first event invite through the show-floor handshake, your team isn’t selling cold. They’re continuing a conversation that already has context. That kind of alignment (brand, spatial design, collateral, digital promotion, and staff training all pulling in the same direction) is where a creative partner who thinks in full event systems, not isolated deliverables, makes the difference between a booth that looks good and one that actually generates pipeline.
2. Design Your Demo Zone as Trust Architecture
A fintech demo that fumbles even once doesn’t just lose attention. It raises doubt. And doubt, in a category where the product literally handles money, is the one thing your booth can’t afford to generate.
Most competitors mention secure demo kiosks in their event planning. Very few think through what actually makes a live fintech demo feel credible at the moment it’s happening. For payments infrastructure, fraud detection, regtech platforms, or crypto products, the physical setup is doing trust work before the presenter says a word. A wobbly tablet on a generic stand, a screen frozen on a loading spinner, a demo requiring the prospect to squint at tiny text: these aren’t minor inconveniences. They’re credibility fractures.
Two Demos, Two Purposes
The anatomy of a strong fintech demo zone starts with separation. You need two distinct experiences: a quick public-facing interaction for aisle browsers, and a deeper private walkthrough for qualified prospects your team has pulled in.
The front-of-booth interaction should run 90 to 120 seconds. Enough time to show one compelling workflow, land one clear moment of value, and create the reason to step deeper into the booth. The private demo gets more time, more screen real estate, and a quieter environment where the prospect can ask real questions without feeling like they’re holding up a line.
Hardware and Wayfinding
Clean touchscreen flows on locked-down devices (not your sales rep’s personal iPad with Slack notifications popping up mid-demo) signal operational discipline. Obvious wayfinding, whether it’s a subtle floor graphic or a branded partition, tells visitors exactly where to stand and what to expect next. Real-time previews or guided walkthroughs should feel like the prospect is seeing the actual product, not a slideshow about it.
Plan for Failure
Wi-Fi drops. Hardware freezes. Dongles vanish. An offline fallback (a pre-recorded demo video, a high-fidelity clickthrough prototype, even a beautifully designed walkthrough printed on heavy stock) is the difference between a minor hiccup and painful silence while your rep fumbles with a hotspot. Simple contingency thinking should be baked into the demo plan, not improvised on the morning of day one.
This is precisely where a full-service creative partner earns their place. The booth structure, the demo script, the device configuration, the print backup, and the on-site troubleshooting plan aren’t separate workstreams. They’re one system. When Urban Geko designs a demo environment, the goal is making it feel polished and resilient, not just attractive. A demo zone that recovers gracefully from a glitch actually builds more trust than one that never gets tested.
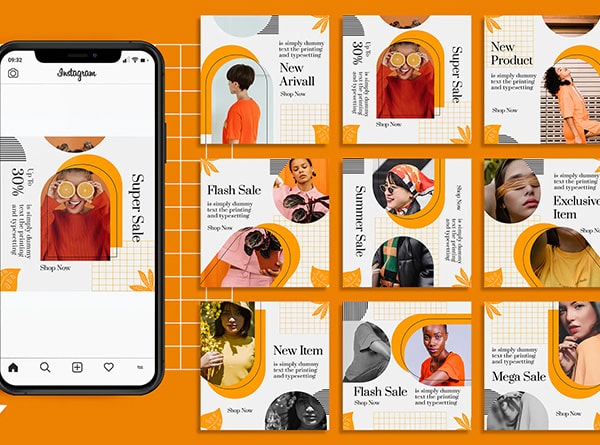
3. Design Booth Graphics for Instant Clarity at a Distance
Finance audiences triage a trade show floor, not browse it. Years of scanning dense spreadsheets and pitch decks have trained them to make rapid judgments about whether something is worth their time. Your booth graphics have roughly three seconds to pass that filter.
The problem isn’t a lack of information. It’s an excess of it. Cluttered charts, paragraphs of body copy at 18pt, decorative gradients competing with key data points, product screenshots shrunk to illegibility. These are the hallmarks of a booth designed by committee, where every stakeholder got their content onto the wall and nobody asked whether a human walking past at normal speed could actually process any of it.
One Idea Per Surface
Each wall or panel gets one idea. Not one product. Not one paragraph. One idea. Your backwall carries the headline promise. A side panel displays a single proof point (a percentage, a client count, an outcome metric) large enough to read from 15 feet away. Another surface shows a simplified platform diagram stripped to three or four nodes instead of the full technical architecture.
Type size for proof points should be aggressive. If your key stat isn’t legible from the aisle, it functionally doesn’t exist. Secondary copy (a brief supporting sentence, a clarifying subtitle) can sit closer to conversational reading distance, but it should never exceed two lines. Anything longer belongs on a one-pager your team hands over during the conversation.
Contrast, Not Decoration
High contrast between background and foreground is the single most impactful design decision for trade show legibility, and the one most frequently sacrificed to aesthetic preference. Dark background with light type, or light background with bold dark type. Subtle tonal palettes that look stunning on a laptop screen disappear under convention hall lighting.
Dimensional branding elements (raised logos, backlit panels, textured surfaces) earn their place when they improve visibility or reinforce brand recall. A backlit logo creates a focal point. A raised element on a key proof point adds tactile authority. Dimensional design that adds visual noise without serving comprehension is just expensive clutter. When your booth’s dimensional elements are built on a thoughtful approach to fintech logo design & brandmark systems, every raised surface and backlit panel reinforces recognition rather than adding noise.
Extend the System Beyond the Shell
The same visual discipline that governs your walls should carry through to every piece of collateral your team distributes during the event. Infographic one-pagers should feel like a portable version of the booth story, using the same colour system, typographic hierarchy, and restrained approach to copy. Digital brochures sent in follow-up emails should look like they came from the same creative hand. Presentation slides used in meeting rooms off the show floor should reinforce the visual language visitors just experienced at your booth. Even team apparel and lanyards play a role in whether the brand system reads as unified or improvised.
That kind of cross-format consistency, where environmental graphics, print collateral, digital assets, and event apparel share one coherent design DNA, is where most exhibitors quietly fall apart. It’s also where a design-first creative partner who thinks across mediums pulls ahead. When every touchpoint confirms the same visual standard, the brand stops competing for attention and starts earning trust before the first handshake. Sustaining that standard across events and teams becomes far more achievable when it’s anchored in a rigorous fintech brand style guide creation process that documents every visual and verbal rule.
4. Design Your Booth Layout to Qualify Conversations, Not Just Collect Foot Traffic
A fintech conversation can shift from casual curiosity to compliance questions, integration specifics, or partnership terms in under sixty seconds. If your booth treats every interaction identically, you’re either exposing sensitive discussions to the entire aisle or forcing serious prospects to shout over a product loop video.
The fix requires thinking about your floor space as three distinct zones, each designed for a different stage of conversation.
Three Zones, One Flow
Front-of-booth hook: Your aisle-facing edge. Open, approachable, staffed by your most energetic greeters. A standing-height counter or narrow demo rail sits here with a screen running the 90-second loop. The job of this zone is singular: give someone a reason to stop. No seating, no walls. Just a clear visual hook and a human ready to start talking.
Mid-booth demo area: One or two steps deeper, where demo stations live oriented so screens face inward rather than toward the aisle. A half-wall or change in flooring material signals the transition. Visitors here have opted in. Your demo specialists should be stationed in this zone, not pulled to the front for badge scanning.
Back-of-booth meeting space: Your controlled zone. Semi-enclosed seating for two to four people, lockable storage for NDAs, and a visible check-in point for app-booked meetings. A 42-inch panel at standing height combined with acoustic dampening creates enough separation to signal “this conversation is different.” Pre-qualified prospects bypass the front zones entirely.
Matching Layout to Booth Size
A 10×10 booth is honest about its constraints. One standing counter, one screen, and a small conversation nook created by angling a side panel inward. Private conversations happen off-floor or in a nearby lounge.
A 10×20 booth opens up the mid-zone. Two demo stations oriented inward, with a back corner partitioned for a two-person seated consultation nook. This is the smallest footprint where all three zones function independently.
A 20×20 booth supports real conversation quality. A front counter with greeter stations, a dedicated demo island in the centre (with sightlines letting managers monitor traffic flow), and a semi-enclosed back meeting space seating four with a small storage closet.
A 20×30 booth accommodates a mini theater (six to eight seats for micro-presentations), multiple demo stations with different product focuses, and a fully enclosed meeting pod with a door. Staff routing becomes a genuine design variable at this scale, with paths wide enough for your team to move between zones without squeezing past demos in progress.
Sightlines, Privacy, and Staff Flow
The layout choices that separate a thoughtful booth from a generic one are almost invisible to visitors. Clear sightlines from the back meeting area to the front let your team lead redeploy staff when traffic spikes. Angled partitions prevent dead corners where visitors feel trapped. Visible meeting check-in signage near the entrance tells pre-booked prospects they’re in the right place and signals to walk-ins that serious conversations happen here.
This kind of integrated spatial thinking, where sightlines, acoustics, staff movement, and conversation privacy are solved as one interconnected problem, is what separates a booth that collects badges from one that builds pipeline.
5. Choose One High-Value Activation That Earns the Conversation
Generic swag draws foot traffic. A stress ball shaped like a dollar sign gets pocketed and forgotten before the attendee reaches the next aisle. Useful micro-experiences draw qualified conversations. That distinction matters when the goal is pipeline, not booth buzz.
The strongest activations deliver immediate, personal relevance tied directly to the problem your product solves. Not a prize wheel. Something the visitor walks away from thinking “that was genuinely useful,” which is a very different reaction than “that was fun.”
Value-First Activation Design
Consider a payments company running a five-minute fraud vulnerability assessment at their booth. A visitor answers a short series of questions about their current processing stack. The tool returns a personalised risk snapshot: where their gaps are, what patterns to watch, how they compare to industry benchmarks. The visitor just received something actionable. The sales team just received a qualified, self-segmented lead who has openly described their pain points.
That’s the model. The format varies by product and audience:
- A short AI concierge interaction that diagnoses a workflow bottleneck
- An AR explainer visualising how data moves through your platform in 60 seconds
- A live podcast corner capturing quick-take interviews with attendees (content capture and engagement in one move)
- A selfie-ready feature wall tied to a real product story, not just your logo
The common thread is a fast, relevant payoff. The visitor gains insight or content they actually want. Your team gains context for a meaningful follow-up.
Dwell Time and Conversion Flow
Front-of-booth activations should target 90 to 180 seconds of engagement. Long enough to deliver value and capture information. Short enough to prevent a bottleneck at the aisle edge. Anyone whose interaction surfaces a deeper need gets routed to the mid-booth demo area or handed off for a booked meeting. Longer conversations move deeper into the booth, not clog the front zone where new visitors are still making their three-second decision about whether to stop.
Staffing, Capture, and Content
Station at least one dedicated activation host at the front, separate from your demo specialists. This person understands the flow, keeps the energy consistent, and knows exactly when to transition a visitor to a deeper conversation.
Every interaction should produce something capturable: a lead record with self-reported context, a shareable photo or video moment, a content clip your marketing team repurposes post-show. The best activations serve double duty as real-time content engines for social and email follow-up.
This is where planning across disciplines pays off visibly. When the creative concept, the environmental design housing it, the collateral handed out alongside it, and the post-event content strategy are all developed as one integrated system, the activation feels seamless. When those elements come from separate vendors assembling pieces at the last minute, visitors sense the seams. A unified approach to fintech marketing collateral design ensures that every handout, leave-behind, and follow-up asset carries the same trust signals your booth communicates in person.
6. Design Your Booth Around Lead Capture and Measurable Conversion
A badge scan tells you someone stood near your booth. It doesn’t tell you they cared.
The gap between “scanned” and “qualified” is where most fintech exhibitors lose their return on the event. Thousands of badge records flow into a CRM, sales gets a spreadsheet with no context, and follow-up emails land with the relevance of a cold call. The booth generated foot traffic. It didn’t generate pipeline intelligence.
Designing for capture and conversion means engineering specific moments into the booth experience where intent becomes visible and recordable. Not after the show. During it.
Capture Mechanics That Create Context
QR-based or badge-tap lead capture synced directly to your CRM eliminates the transcription lag that kills follow-up quality. But the sync is only as valuable as the data attached to it. The real design move is building structured “choose your next step” moments into the visitor journey.
After a demo or at the activation exit point, present three clear options:
- Book a deeper technical walkthrough
- Receive a specific piece of collateral (a case study, benchmark report, or integration guide)
- Schedule a post-show consultation with a named specialist
Each choice tags the lead record with intent data your sales team can act on. The visitor self-qualifies. The CRM record arrives with context instead of just a name and company. A tablet at a demo station with three tappable options is frictionless. A paper form clipped to a clipboard is 2009.
When Connectivity Fails
Convention Wi-Fi is a known variable, not an unexpected one. If your entire capture system depends on a live connection, you’ve built a single point of failure into your most expensive marketing moment.
Offline capture backup is non-negotiable. Apps that queue submissions locally and sync when connectivity returns. NFC-enabled badge readers that store data on-device. The process should still work cleanly when the network doesn’t.
Connecting Measurement to Long-Term Booth ROI
The metrics that matter aren’t badge counts. They’re booked meetings, demo completions, and follow-up actions selected. When those numbers are tracked consistently across shows, you build a dataset that makes every future event smarter: which activations drive the most qualified conversations, which booth configurations produce the best meeting-to-opportunity ratio, which messages resonate with which segments.
This is where the investment thesis shifts from “build a booth for this show” to “build a booth system that compounds.” Modular structures that reconfigure across footprints. Reusable graphics on sustainable materials that update without full replacement. Brand-consistent hardware and signage that travel from event to event, refining rather than restarting each quarter. That commitment to cohesive physical brand materials naturally extends into fintech product packaging design, where card mailers, welcome kits, and device enclosures reinforce the same trust signals your booth establishes.
That kind of system only works with continuity across the full event lifecycle. A creative partner who preserves your brand’s visual standard from one show to the next, adapts the modular layout to a new floor plan without redesigning from scratch, and keeps your capture workflow improving based on real performance data. That’s the relationship where a trade show program stops being a series of expensive one-offs and starts generating compounding returns.
Frequently Asked Questions
How much do fintech audience research services usually cost?
Most credible firms scope custom statements of work rather than publishing fixed rates, because the variables shift the budget dramatically. Directional ranges run from $25,000 for a focused discovery sprint to $150,000 or more for a multi-method program that includes quantitative validation. The biggest price drivers are recruitment difficulty (executive panels and underbanked fieldwork cost significantly more than general consumer panels), geographic spread, method complexity, and whether the scope includes quant survey validation on top of qualitative findings. Those first two variables, recruiting senior B2B stakeholders and reaching underserved populations, tend to move the budget fastest.
How long should a good fintech audience research project take?
A credible engagement typically runs six to twelve weeks, covering stakeholder alignment, screener development, recruitment, fieldwork, synthesis, and a structured readout. A fast discovery sprint (qualitative interviews with a defined segment) can land in six weeks. Fuller programs involving segmentation, quantitative validation, or multi-market recruitment need the longer runway. Compressing below six weeks usually means cutting corners on recruitment quality or synthesis depth, both of which undermine the entire investment.
What deliverables should I expect from a serious partner?
At minimum: validated personas, a segmentation matrix with priority scoring, journey maps tied to real behavioral data, trust and messaging findings, feature or benefit prioritization outputs, raw data or session clips for internal review, and an implementation roadmap connecting each finding to a business metric. The critical test is whether the deliverables help product, marketing, and leadership make specific decisions. If the final output summarizes interviews without telling anyone what to do differently, the research hasn’t finished its job.
Should we do this in-house or work with a specialist partner?
Internal teams win at continuous listening, existing product analytics, and institutional context. A specialist wins where recruitment is hard (senior executives, underbanked populations), where neutral synthesis prevents internal politics from filtering findings, where cross-functional alignment needs an outside voice to hold, and where compliance-sensitive study design requires specific expertise. The best outcomes usually blend both. The right partner feels like an extension of the team rather than a vendor managing a handoff, which is exactly the model Urban Geko brings to research-to-execution engagements.